Antique Hutch Makeover + Fabric "Wallpaper" Back
AFFORDABLE DO IT YOURSELF HOME PROJECTS | ANTIQUE HUTCH MAKEOVER | HOW TO ADD FABRIC TO FURNITURE | BEFORE AND AFTER FURNITURE MAKEOVERS
I was on the fence for years about an antique hutch that sits off my kitchen. From afar, it was amazing. Sadly, up close, the hutch had A LOT of problems!
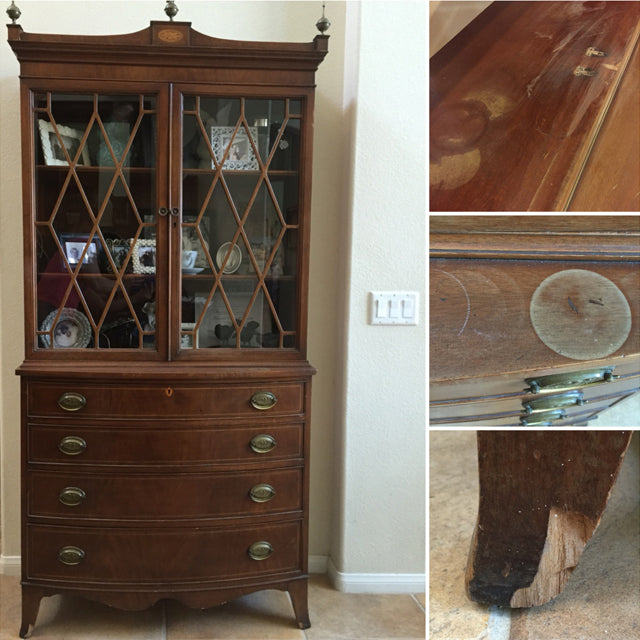
To bring the hutch back to its former glory would have been quite an undertaking, and truthfully, I was ready for something a little brighter. So, even though I believe many antiques should not be painted, this little guy was the perfect candidate for a makeover.

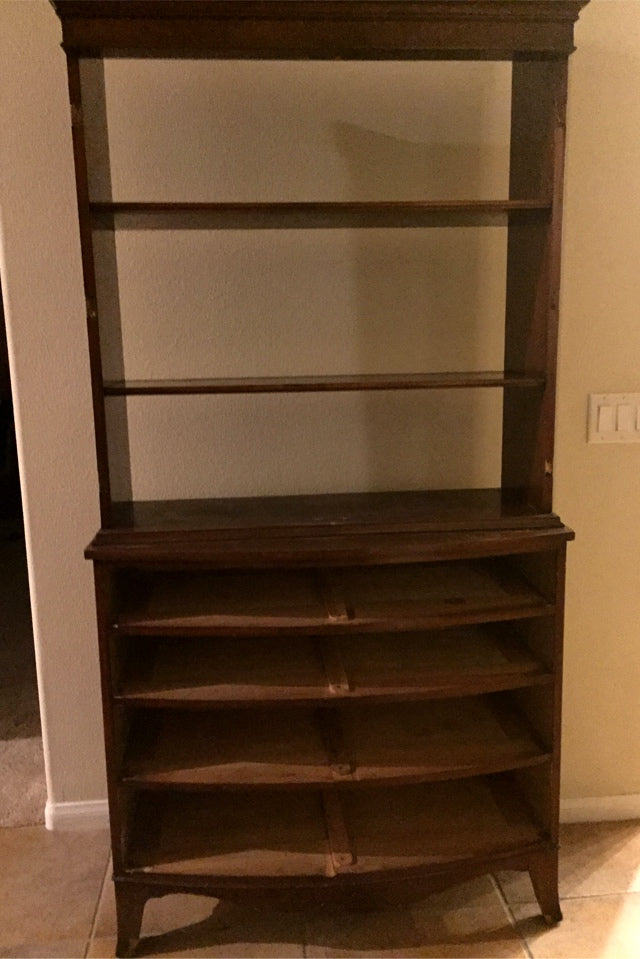
I began by disassembling the hutch:
-
Remove doors and drawers
-
Remove hinges, pulls and knobs
-
Remove lattice work on doors
-
Remove glass from doors
-
Remove Hutch back*
-
Typically with antiques, there is buildup of junk under pulls and hinges, so you want to get that cleaned off (I use Pine-Sol.)
-
Sometimes the original hardware looks best! If you don’t like the look of the hardware once you’ve tried it on your painted piece, you can always paint the hardware at that point.
-
It is way easier to remove glass than to tape it off and paint around. Besides, the finished piece just looks more professional.
-
*Even if you don’t want to do a fabric or wallpaper back on your hutch, removing the back makes a hutch SO MUCH EASIER TO PAINT!
Patch and Putty?
Spray or Brush?
I also always use a brush for antiques, even though the job would go much faster by using my paint in a sprayer. Since paint sprayers didn’t exist when my antique was made, I think a brushed finish looks more authentic.
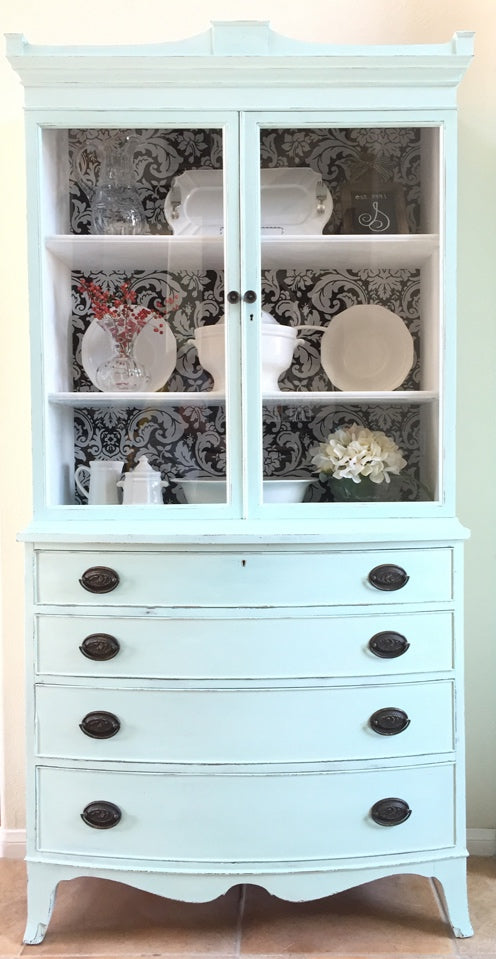
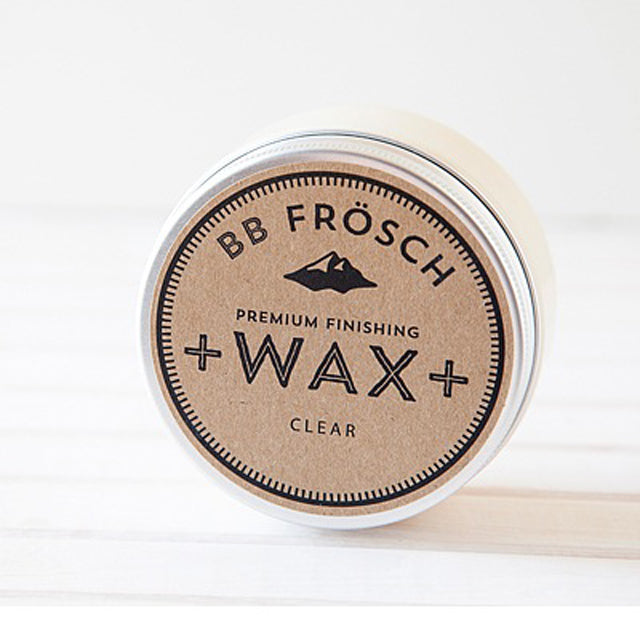
I made my own chalk/mineral paint for this project using BB Frösch Paint Transformer. I avoid any sanding, priming or stripping this way, and I can choose whatever color I want. Besides that, it is so much more affordable than pre-mixed chalk or mineral paint. I chose to paint the interior white (Benjamin Moore “Alabaster" mixed with BB Frösch Paint Transformer) and the rest of the hutch a light minty blue color (Benjamin Moore “At Sea” mixed with BB Frösch Paint Transformer.)
Notice the interior only has one coat of paint, while the exterior has two coats. What a difference that second coat makes!
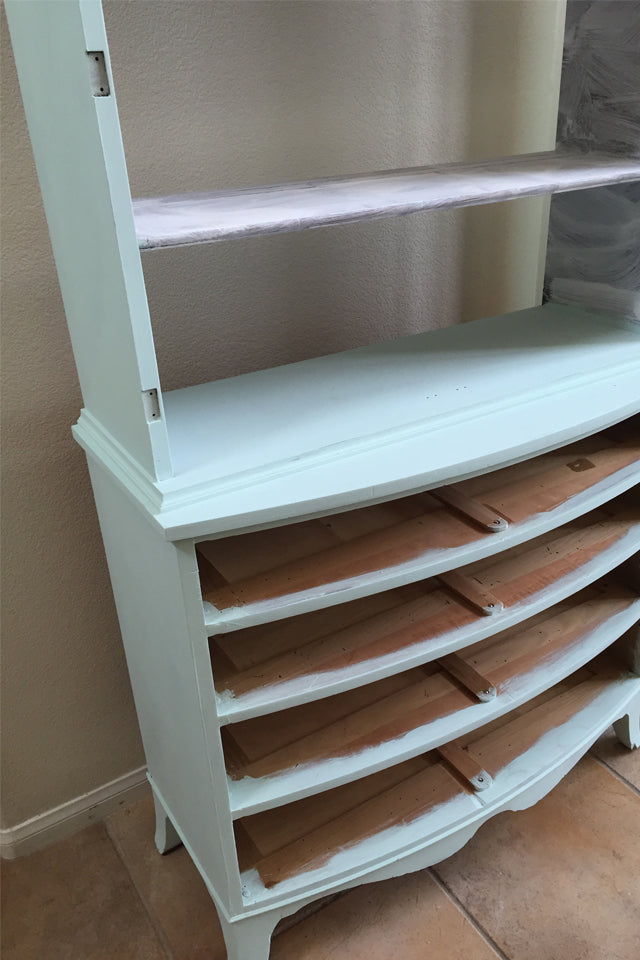
Once the hutch was painted, I did some minor distressing with 220-grit sandpaper. I didn't want a shabby chic look, but again, I wanted to stay true to the integrity of the piece, and an antique like this wouldn't have made it this far without a little distressing!

I sealed the piece for protection with BB Frösch Clear Premium Finishing Wax. This is my go-to for ANY antique. To me, this is a more authentic finish since the poly urethane and poly acrylic finishes of today didn’t exist back then. Besides, I think wax just looks softer and prettier.
For the fabric back, I used a decorator fabric I snagged on clearance at Hobby Lobby for just $7.
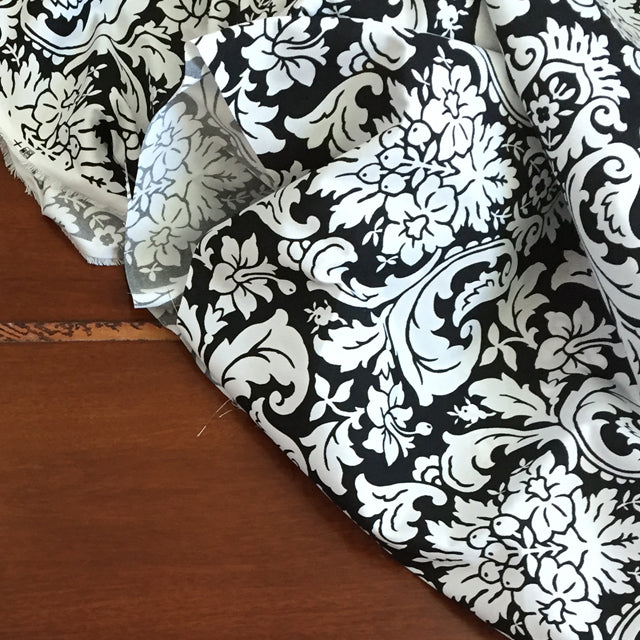
Turning any fabric into “wallpaper” is SUPER EASY and, if you ever get tired of it, the fabric is really easy to remove. This works perfectly for fabric on walls, too!
-
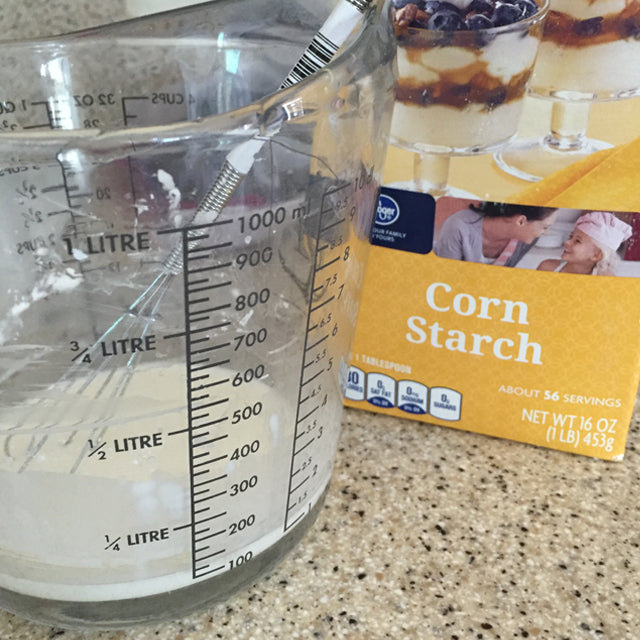
Whisk together 1/4 C Corn starch with about 1/4 water
-
Add mixture to 2 c boiling water and whisk until mixture thickens
-
Remove from heat and allow to cool
This makes a LOT of paste! I barely used any for this project.
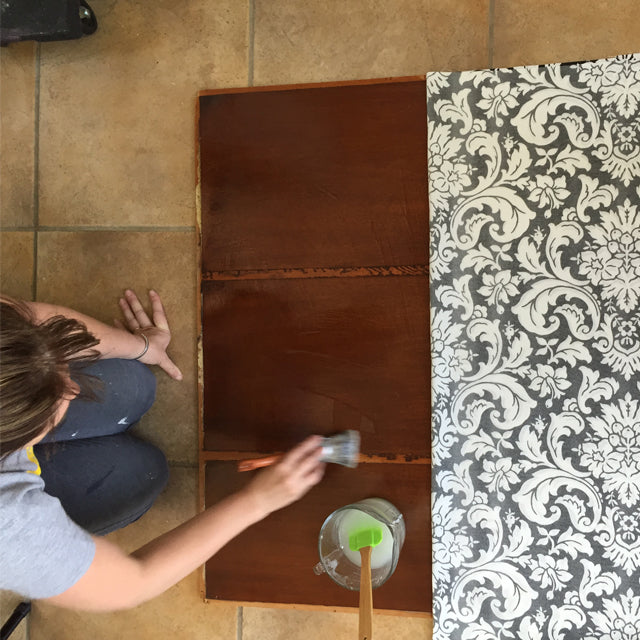
I laid my hutch back on the floor and lined up my fabric on top of it. Then, I folded half the fabric back and brushed my paste onto the hutch backing. Then, I simply unfolded the fabric and smoothed it over the backing. I repeated these steps with the right half of my hutch back. It is easy to smooth the fabric out. Allow to dry. The corn starch paste dries nice and clear.
I trimmed the fabric to fit the hutch back after it was glued on, then I used a nail gun to re-attach the hutch backing, and voilà!

Just in case you forgot what it looked like before, here's a side-by-side comparison:
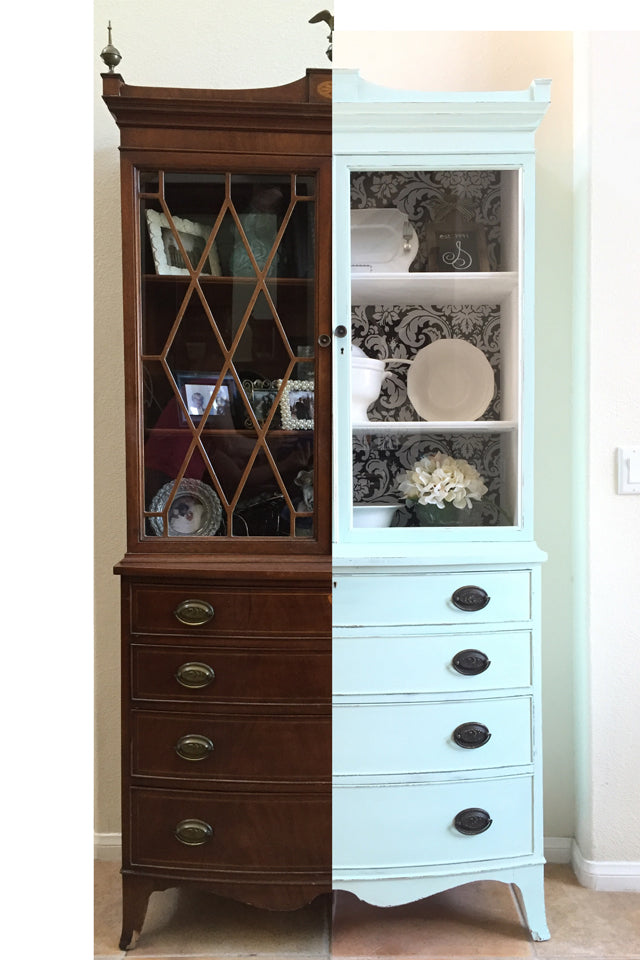
I am in love with the fabric back!
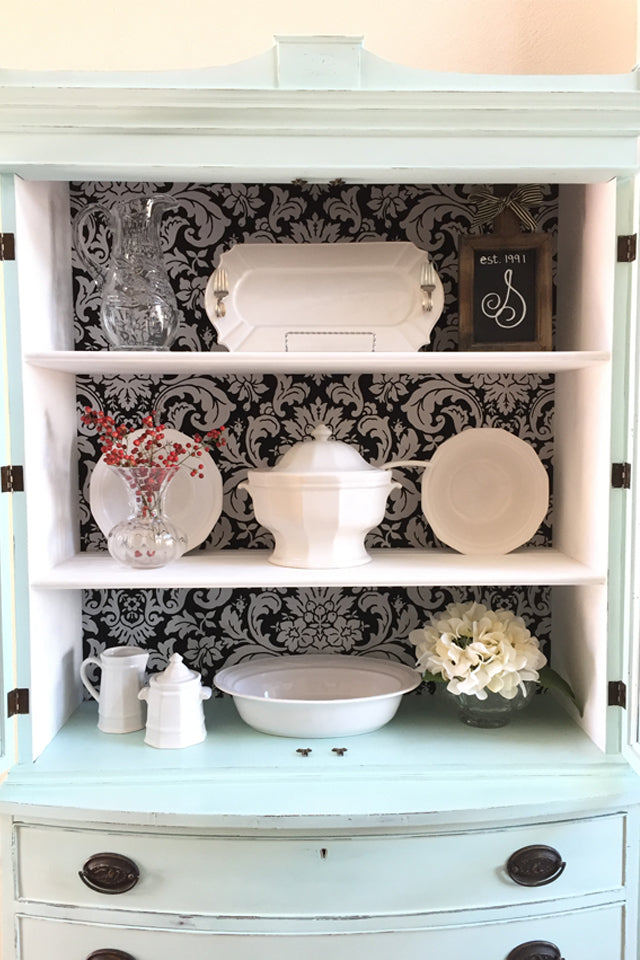
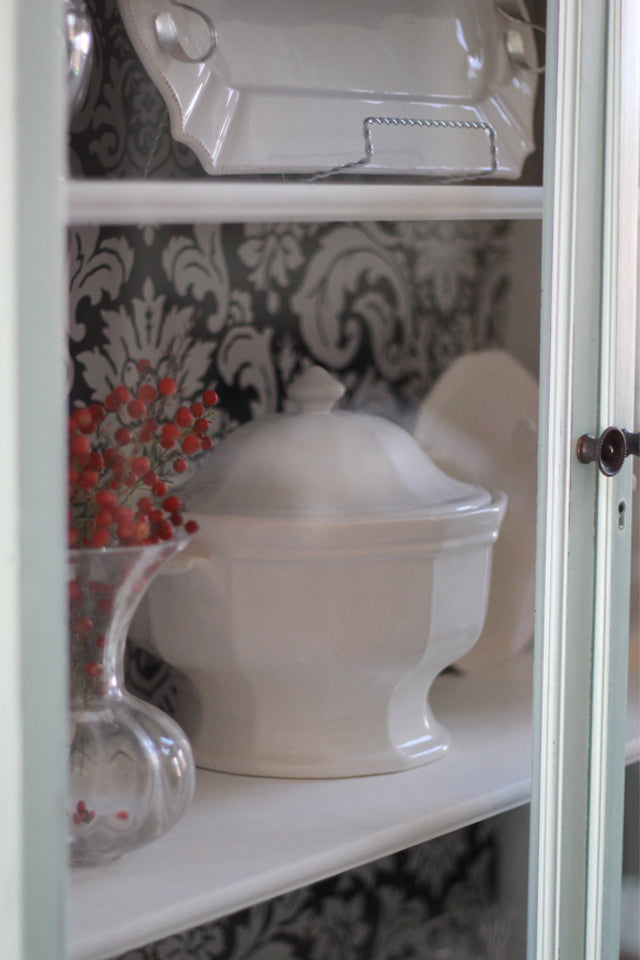
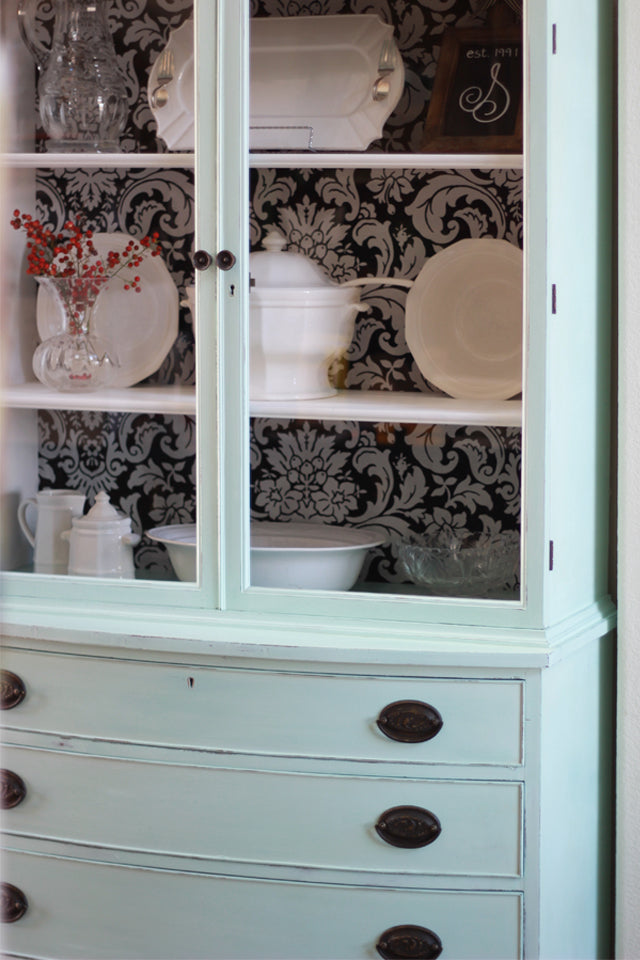
So much lighter and brighter!